Look Cute in Less than 5 Minutes


 Now that the time has changed, are you finding that you are getting out of bed earlier? Nah, me either. I mean I wake up, but I look at Pinterest and Instagram and by the time you know it, I'm scrambling to get ready for work in the morning. If you are anything like me, then quick and easy hairstyles are your go to when getting ready. Here are a few of my fav that I've shared on the blog.
 xoxo erica

Hair Tutorial // Bubble Topsy Tail

 Every Thursday Chris and I play softball in a co-ed league with a team made up of his family and my brother. I really try to avoid wearing my hair in a pony tail because of my little baby hairs that fly up when my hair is pulled back. I usually wear my hair in a braid of some sorts and just pin back any loose hairs. Last week I tried out this hairstyle and really liked the look of it. The tightened topsy tail kind of reminds me of a fishtail braid but different, if that makes any sense? Anyway,  I thought I would share. It's quick and easy so give it a try this weekend.
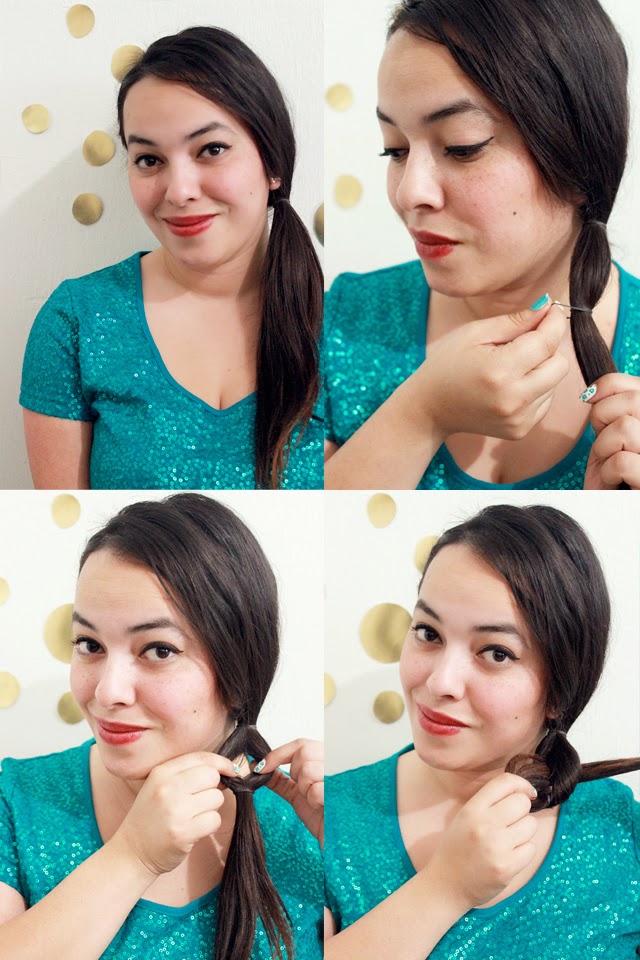
 Pull hair to one side and loosely rubber band.
Place another rubber band about 2 inches down from first rubber band to create the first "bubble".
Start doing a topsy tail by splitting hair into two sections.
Pull hair through the hole. 
 Pull on hair to tighten your topsy tail.
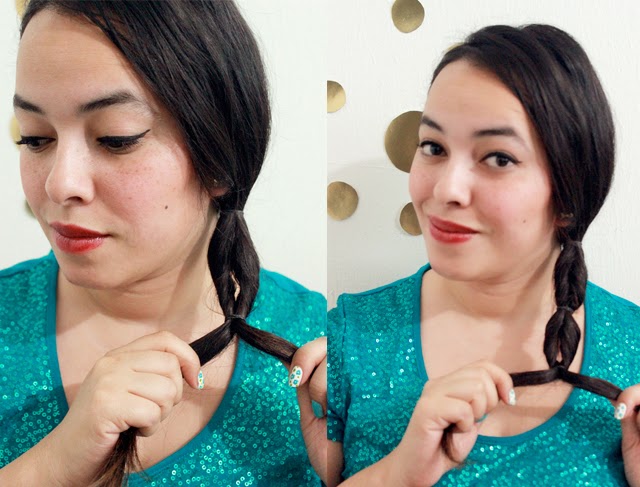
Rubber band hair a little further down again and repeat steps.
 Keep going until you have a bunch of bubbles.
xoxo erica

Simple Bobby Pin Hair Tutorial

 Since I've cut my hair it's been extremely hard for me to do different hairstyles...especially with having layers. I haven't had my hair this short since about 6 years ago! Lately I've been using this tutorial but I recently straightened my hair and wanted a more dressed up look...you know something with a bit of effort. And yes, those do happen to be glitter bobbies in my hair. I used this diy concept to get the glitter look.
1. Part your hair.
2. Separate the section that will be pinned and pull back the rest.
yay! glitter bobbies!
3. Place bobby pins at an upwards angle...you can let your down here.
4. Place bobby pins at a downwards angle...forming an "x"
All done :)

xoxo erica