Sally Hansen Dive In, NYC Pink Promenade Creme, Essie Tart Deco, L'oreal Royally Yours
I've been loving all the bright nail polishes that are out right now and fell for this gorgeous blue on our last trip to Target. I think that Chris is catching on to the fact that when I say, "let's go grocery shopping at Target" it really means, "let's get a few things to eat while I get all the other stuff I really want like clothes, magazines, or in this case nail polish". haha Hopefully he's not though. Last year I got into nail art and even shared a few tutorials on the blog. I haven't in awhile and thought it would be fun to share a few quick ones to get you excited about summer since it's right around the corner.
Summer Silhouettes
This reminds me of summer sunsets and really makes me think of the beach...my happy place.
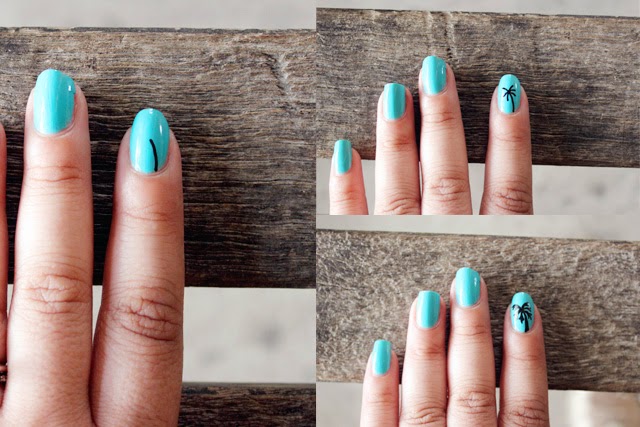
I did palm trees which were pretty easy to draw with a nail art pen. Just a simple curved line for the trunk, small curved lines for branches, and then adding leaf like points. Let the palm tree go solo or add another :)
Wouldn't this be fun with flamingos too!?!
Pops of Color
This nail idea is what I would call summer fun...the combination of bright and bold colors are perfect for summer. I made this effect by simply dipping a q-tip into some polish. The dots don't come out completely perfect but I like it that way. Once the first color dries, add another color of dots just slightly off the original ones. Have fun with the color combinations.
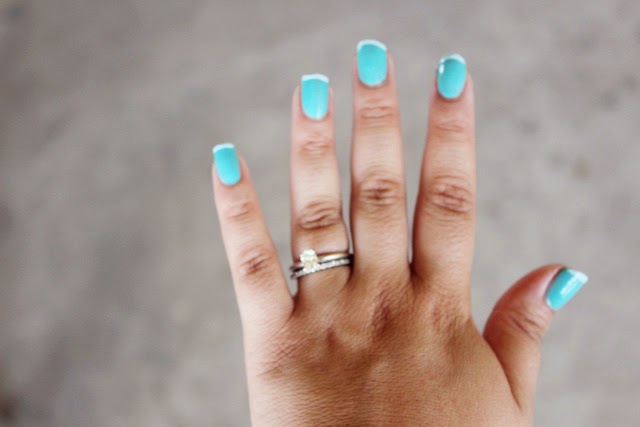
Pastel Tips
This look is great for when you want something a bit more classic but with a fun twist. I went with the bright blue as my base and used the pastel polish for my tips but I think it would be just as pretty reversed. Simply put a strip over the base polish once it's dried and pat it down to make sure everything is sealed off so when you paint the tips the polish won't bleed over. Paint the tips and remove the tape once dry. If you feel confident enough with a steady hand you can free hand painting the tips.
Fun right? Do let me know if you try any of these!
xoxo erica