A Month of Gifting // DIY Fringe Gift Bags

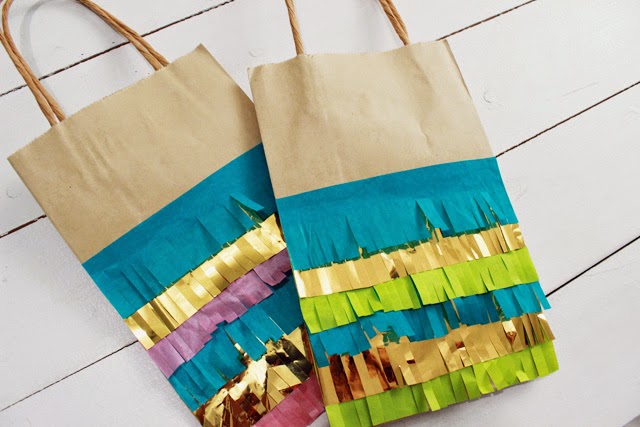
This month is going to be all about gifting. Cute packaging ideas, fun gifts in a box, and simple diy gifts...everything to get you ready for the holiday season. Are you excited for the holidays yet? I actually bought a Christmas decoration over the weekend which isn't like me. I usually don't like starting Christmas stuff until Thanksgiving has passed. I'm not sure what has gotten into my but I actually kinda like it. I've always loved fringe garlands and thought a little fringe would make the cutest festive bags around town. This is an easy diy and if you have a ton of different colors of tissue paper like me, then the color combinations are endless. My favorite always include gold foil.
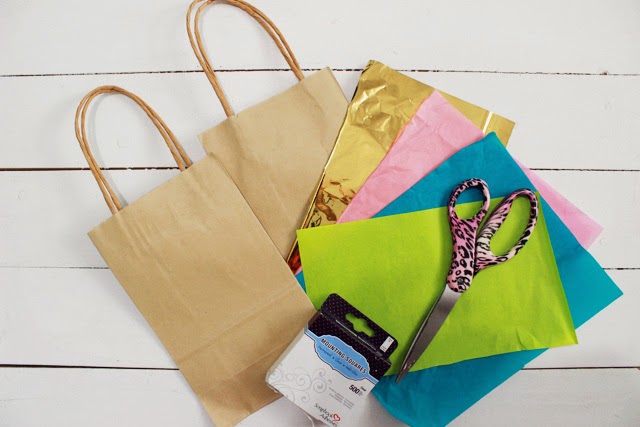
 Supplies: Bags, Tissue Paper, Double Stick Tape, Scissors
 1. Cut strips of tissue paper the length of the front of the bag and about 1 1/2 inches wide.
2. Use double stick tape or scrapbook adhesive and place to back of the tissue strip.
3. Adhere the tissue strip to the bag and cut fringes about 1 inch into the tissue paper.
4. Once all pieces of tissue paper are on the bag fluff up the fringes with your hands.
So easy...just fill up with an awesome gift!
Let me know if you try this with an instagram pic #sobdamonthofgifting #sobdlife

xoxo erica

A Month of Being a Cat Lady // DIY Black Cat Coasters

With Halloween around the corner, I couldn't resist making October a month of being a cat lady!! There is always some kind of get together going on all the time for halloween festivities and I thought these would be perfect to use at some of our parties. Actually, I'm not gonna lie, I think they are perfect for all the time. All my cat ladies agree right?
1. Draw out a cat template and trace onto cork board. 
2. Cut out and paint with black paint.
3. Sprinkle glitter on paint while still wet. 
4. Once dry bend cork board to flatten it out.
5. Brush on a layer of mod podge to seal everything in and let dry. 
let me know if you give this a try #sobdcatlady #sobdlife
xoxo erica

A Month of Cake // Easy Heart Sprinkle Cake

 Over the weekend Chris asked me to bake him a cake. One of his favorites is a yellow cake with chocolate frosting...yum. I wanted to do something a bit creative with it and I've always loved the pop of color from sprinkles against chocolate frosting. This turned out really well and Chris was super impressed. I thought this was a great way to kick off A Month of Cake...lots of yummy and fun stuff around the corner.
1. Start by frosting your cake.
2. Place parchment paper stencil in the center of cake. I simply folded a piece of parchment paper in half and cut out half a heart to make a full heart. 
 3. Shake sprinkles onto cake.
4. After a about half of the heart is complete, pat down with your finger to ensure sprinkles are sticking to the frosting.
5. Repeat for the other half of the heart.
 6. Carefully lift the parchment paper from the cake. The frosting will be messy but just smooth it out.
And you're all done. I loved the way it came out. I think it would work out really great with large numbers or letters. Let me know if you give it a try. #sobdamonthofcake

xoxo erica